7 Tips for Motion Capture Character Animation Rigging
When setting up a motion capture character animation rig, you'll need to plan ahead, considering character requirements, technical constraints, and animation goals. Choose a skeleton design that suits your character type and animation style, and establish a well-structured hierarchy to ensure efficient motion capture. Use constraints to create complex interactions and prevent unwanted movements. Next, test your rig thoroughly to identify and address any issues, and optimize it for real-time playback by simplifying the hierarchy, limiting animation controls, and using proxy geometry. As you set up your rig, remember that every decision affects performance, and attention to detail will yield a more robust and efficient character animation.
Key Takeaways
- Define character requirements driving rig architecture during planning stages to ensure correct movement complexity and realism.
- Establish a well-structured character hierarchy with a standard naming convention to enable efficient motion capture and avoid performance issues.
- Test the rig thoroughly to identify and address any issues, running through a rigorous testing checklist to validate the rig.
- Optimize the rig by simplifying the hierarchy, limiting animation controls, and using proxy geometry to reduce simulation times and improve performance.
- Verify motion capture data application and rig setup to ensure correct translation and prevent issues during animation.
Plan Your Rig Ahead
Before diving into the complexities of motion capture character animation rigging, take a step back to plan your rig ahead. This crucial stage lays the foundation for a successful project.
During the rig planning stages, you'll define the character requirements that will drive your rig's architecture. Identify the character's intended use, such as game development, film, or TV production.
Consider the level of realism, stylization, and movement complexity required. Will your character need to perform intricate movements, like martial arts or dance, or will it primarily walk and run?
You'll also need to determine the number of characters, their body types, and any unique features, like wings or tails. Additionally, think about the technical constraints, such as file size and processing power limitations.
Choose the Right Skeleton
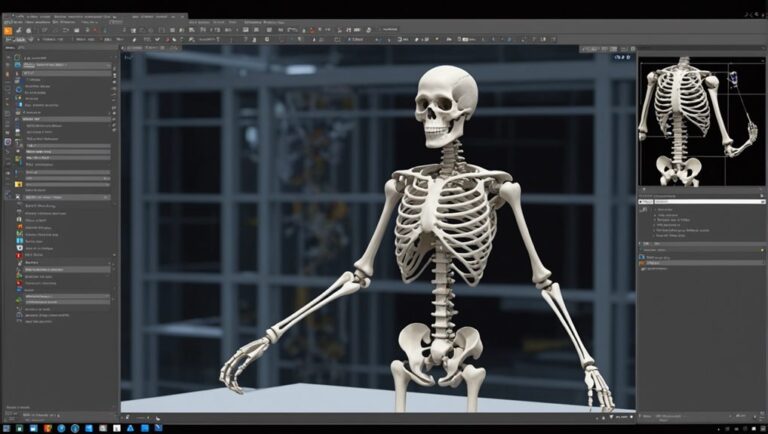
When choosing the right skeleton for your character, you'll need to decide on a skeleton design that suits your animation style and character type.
You'll have to consider options such as a humanoid, quadruped, or bespoke skeleton, each with its own set of advantages and limitations.
Skeleton Design Options
Designing a skeleton for motion capture character animation rigging requires careful consideration of the character's anatomy, movement patterns, and the type of animation you're aiming to achieve.
You need to determine the level of skeleton complexity that suits your project. A more complex skeleton with a higher number of bones can provide more realistic deformation and movement, but it can also increase the computational overhead and make the rigging process more challenging.
On the other hand, a simpler skeleton with fewer bones can be more efficient but may lack the desired level of realism.
When deciding on the skeleton complexity, you should also consider the character's proportions. For example, if your character has long limbs or a large body, you may need to add more bones to achieve a more realistic deformation.
Additionally, the type of movement you're aiming to capture also plays a crucial role in determining the skeleton complexity. For instance, if you're capturing subtle finger movements, you'll need a more complex hand skeleton.
Joint Hierarchy Structure
You've determined the optimal skeleton complexity for your motion capture character animation rig, considering the character's anatomy, movement patterns, and animation goals.
Now, it's time to focus on the joint hierarchy structure. This is where you'll define the relationships between joints, creating a hierarchical system that allows for efficient animation and deformation.
Joint placement is critical in this stage. You must strategically position joints to ensure smooth motion and realistic deformation.
For example, in a human character, you'll want to place joints at the shoulders, elbows, wrists, hips, knees, and ankles to capture the full range of motion.
Hierarchy optimization is also essential. You should organize your joints in a logical, hierarchical structure to facilitate animation and reduce computational overhead.
This involves grouping related joints together, such as those in the arm or leg, and establishing a clear parent-child relationship between them.
Set Up a Solid Hierarchy
Establishing a solid hierarchy is crucial to efficient motion capture character animation rigging.
A well-structured character hierarchy ensures that your rig is stable, easy to maintain, and performs well. As you set up your hierarchy, keep in mind that it's the backbone of your character structure, and any mistakes can lead to problems down the line.
To get it right, follow these essential steps:
- Start with a clear character structure: Organize your character's body parts in a logical and consistent manner. This will help you maintain a clean and efficient hierarchy.
- Use a standard naming convention: Consistently name your bones and joints to avoid confusion and make it easier to identify specific parts of your character.
- Keep your hierarchy shallow: Avoid deep nesting of bones and joints, as this can lead to performance issues and make your rig more prone to errors.
- Use a modular approach: Break down your character into smaller, independent modules that can be easily managed and updated. This will make it easier to make changes and maintain your rig over time.
Use Constraints Wisely
Constraints are the glue that holds your motion capture character animation rig together, allowing you to create complex interactions between bones and joints. By setting up constraints, you can define how your character's limbs move in relation to each other, creating a more realistic and believable animation.
When using constraints, it's essential to understand the different types and their limits. Here's a breakdown of common constraint types and their uses:
| Constraint Type | Description |
|---|---|
| Point | Constrains an object to a specific point in space |
| Orient | Constrains an object's orientation to another object |
| Parent | Constrains an object to follow another object's movement |
| Aim | Constrains an object to aim at a specific target |
| Pole Vector | Constrains an object to follow a specific vector |
You can use these constraint types to create complex interactions, such as making a character's arm follow a sword's movement or keeping a character's feet planted on the ground. Remember to set constraint limits to prevent unwanted movements or over-rotations, ensuring a more realistic animation. By using constraints wisely, you'll be able to create a more believable and engaging motion capture character animation.
Add Muscle and Skin Simulation
With your motion capture character animation rig's skeletal structure in place, it's time to add the nuance of muscle and skin simulation.
This step brings your character to life, making them look more realistic and relatable. Soft tissue deformation and muscle flex simulation are crucial aspects of this process.
To achieve realistic muscle and skin simulation, consider the following:
- Set up muscle flex simulation: Use a muscle flex system to simulate the way muscles contract and relax. This will help create natural-looking movements and deformations.
- Define soft tissue deformation areas: Identify areas of the body where soft tissue deformation is most noticeable, such as the cheeks, shoulders, and chest. Use these areas to drive your simulation.
- Use collision detection: Implement collision detection to prevent skin and muscle from intersecting with other body parts or objects.
- Fine-tune simulation settings: Adjust simulation settings to achieve the desired level of realism and performance. This may involve tweaking parameters such as stiffness, damping, and mass.
Test and Refine Your Rig
You've built your character rig, but it's crucial to test it thoroughly to ensure it's functioning as intended.
Run through a rigorous testing checklist to identify any issues, and then apply optimization techniques to refine your rig's performance.
Rig Testing Checklist
Your rig is now fully set up, but it's crucial to put it through a rigorous testing process to identify and address any underlying issues.
This is where the rig testing checklist comes in. It's essential to validate your rig to ensure it's functioning as intended, and a thorough testing process will save you time and headaches down the line.
- Rig Validation: Test your rig's movement and deformation to ensure it's behaving as expected. Check for any unusual or unwanted behavior, such as twisting or flipping.
- Capture Pipeline: Verify that your rig is correctly capturing and translating motion data from the capture pipeline. This includes checking the accuracy of joint rotations, translations, and scaling.
- Weighting and Skinning: Inspect the weighting and skinning of your character's mesh to ensure it's correctly bound to the rig. Check for any areas where the mesh isn't deforming as expected.
- Animation Testing: Perform a series of animation tests to verify your rig's performance in different scenarios, such as walking, running, or jumping.
Rig Optimization Techniques
Now that your rig has been thoroughly tested, it's time to refine it for optimal performance. Rig optimization techniques are essential to ensure your character animation runs smoothly and efficiently. You'll want to identify and address any performance bottlenecks that may arise during rig debugging.
To optimize your rig, focus on the following techniques:
| Technique | Description | Benefit |
|---|---|---|
| Simplify Hierarchy | Reduce the number of nodes in your rig's hierarchy | Improves simulation performance |
| Optimize Skin Weights | Adjust skin weights to minimize deformation calculations | Reduces CPU usage |
| Limit Animation Controls | Reduce the number of animation controls to only what's necessary | Decreases rig complexity |
| Use Proxy Geometry | Use lower-poly proxy geometry for simulation | Speeds up simulation times |
| Batch Animation | Batch similar animation tasks to reduce overhead | Improves overall performance |
Common Rig Issues
As you put your rig through its paces, it's inevitable that you'll encounter issues that need to be addressed.
Rig debugging is a crucial step in the character animation rigging process. You'll need to test and refine your rig to ensure it's functioning as intended.
Here are some common rig issues you may encounter:
1. Character constraints not functioning correctly: Check that your character constraints are set up properly and that the weights are painted correctly.
Ensure that the constraints aren't conflicting with each other.
2. Joint twisting or flipping: This can occur when the joint orientation isn't set correctly or when the character is moving in an unexpected way.
Adjust the joint orientation or add more control to the joint to resolve this issue.
3. Rig instability: This can happen when the rig isn't properly weighted or when there are too many controllers influencing a single joint.
Re-weight the rig or reduce the number of controllers to resolve this issue.
4. Motion capture data not translating correctly: Check that the motion capture data is being applied correctly to the rig.
Ensure that the data is being translated correctly and that the rig is set up to receive the data properly.
Optimize for Real-Time Playback
Rigging for real-time playback requires careful consideration of character animation complexities, since even minor inefficiencies can significantly impact performance.
You'll need to identify and address potential performance bottlenecks to ensure seamless real-time playback. Start by optimizing your character's skeleton and geometry. Simplify complex meshes, reduce polygon counts, and eliminate unnecessary bones. This will minimize the computational load on your system.
Next, focus on your animation rig's dynamics and simulations. Avoid overly complex simulations that can slow down real-time playback. Instead, use simplified simulations or pre-computed animations to reduce the processing load.
You should also limit the number of animations and blend trees to prevent performance degradation.
When testing your rig, use tools that provide real-time feedback on performance metrics, such as frame rates and CPU usage. This will help you pinpoint areas that require optimization.
Frequently Asked Questions
Can I Use Motion Capture Data for Facial Animations?
You can use motion capture data for facial animations, but it's crucial to optimize the data to capture subtle facial expressions; focus on refining the marker setup and data processing to ensure accurate, nuanced translations of emotional cues.
How Do I Handle Character Clothing and Accessories?
When integrating clothing and accessories into your character's motion capture setup, you'll need to consider clothing simulations and accessory dynamics to achieve realistic interactions. You'll want to define simulation properties, like stiffness and gravity, and set up accessory constraints to ensure believable movements.
Are There Any Specific Rigging Requirements for VR Experiences?
When creating VR experiences, you'll need to prioritize rigging for comfort zones, ensuring your character's movements don't trigger user discomfort; conduct immersion testing to validate your rig's performance, and optimize for seamless interactions.
Can I Rig Characters With Non-Human Proportions or Anatomy?
You can definitely rig characters with non-human proportions or anatomy, like fantasy creatures or hybrid characters, by creating customized skeletons and weighting systems that accommodate their unique features and movement patterns.
How Do I Ensure Consistent Animation Quality Across Multiple Takes?
To ensure consistent animation quality across multiple takes, you'll need to focus on motion consistency, maintaining a uniform style and tempo throughout. Implement take optimization techniques, such as iterating on a "golden take" and using reference videos to guide subsequent performances.
Conclusion
You've reached the final stage of motion capture character animation rigging. By following these 7 tips, you've ensured a robust and efficient rig that's ready for real-time playback. Your careful planning, skeleton selection, and hierarchical setup have laid the foundation for a successful animation. With constraints, muscle and skin simulation, and thorough testing, your character is now poised to come to life. Optimize for real-time playback, and you'll be ready to unleash your creation on the world.


