Mastering 3D Animation; Beginner-Friendly Tutorials Inside
As you set out on the journey to master 3D animation, you’re likely wondering where to start. You’ve heard terms like polygon models and motion capture thrown around, but what do they really mean? Don’t worry, you’re not alone. With beginner-friendly tutorials, you’ll quickly grasp the fundamentals of 3D modeling, from vertices to advanced techniques. You’ll discover how to create realistic textures, bring your models to life, and master essential animation principles. But that’s just the beginning – you’ll soon be keen to explore advanced techniques and tips that will take your animations to the next level.
Key Takeaways
- Start by exploring other animators’ works, watching tutorials, and understanding what sparks creativity to find 3D inspiration.
- Grasp animation fundamentals, including principles of motion, timing, and spacing to create believable animations.
- Learn about different types of 3D animation, such as modeling, texturing, and lighting, to master the basics.
- Break down complex projects into manageable chunks, and develop a unique style and voice in animations to stand out.
- Practice and refine techniques, such as Squash and Stretch rules, anticipation, and follow-through, to create engaging animations.
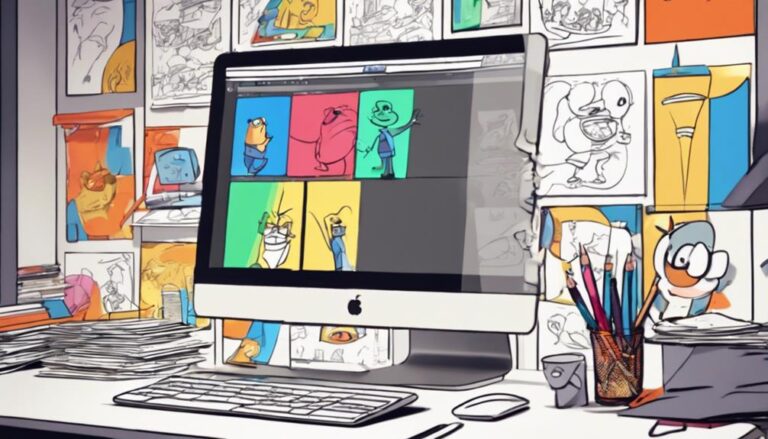
Getting Started With 3D Animation
Developing a strong foundation is vital, so take a deep breath and let’s immerse ourselves.
First, find your 3D inspiration by exploring the works of other animators, watching tutorials, and understanding what sparks your creativity. This will help you develop a unique style and voice in your animations.
Next, it’s time to grasp the animation fundamentals. This includes understanding the principles of motion, timing, and spacing.
You’ll also need to learn about the different types of 3D animation, such as modeling, texturing, and lighting.
Don’t worry if it sounds overwhelming – we’ll break it down into manageable chunks. By mastering these basics, you’ll be well-prepared to take on more complex projects and bring your 3D vision to life.
Choosing the Right Software
With numerous 3D animation software options available, selecting the right one for your project can be a formidable task, especially for beginners. You’ll want to choose software that fits your needs, skill level, and budget.
Some factors to weigh when selecting software:
- Cost: Are you willing to invest in a premium software or opt for free alternatives?
- User interface: Look for software with an intuitive interface that’s easy to navigate, even for beginners.
- Features: Think about the type of animation you want to create and the features you need to bring your vision to life.
- Community support: Choose software with an active community and plenty of online resources to help you along the way.
Understanding 3D Modeling Basics
Now that you’ve selected the right software for your 3D animation project, it’s time to focus on building the foundation of your animation: 3D modeling. As a beginner, mastering the basics of 3D modeling is crucial to create stunning animations. You’ll work with two primary model types: polygon and NURBS (Non-uniform rational B-spline). Polygon models are composed of vertices, edges, and faces, while NURBS models use curves and surfaces to create smooth shapes.
| Concept | Description |
|---|---|
| Vertices | Points in 3D space that define a model’s shape |
| Edges | Lines connecting vertices to form a model’s structure |
| Faces | Polygons formed by edges and vertices |
| Normals | Directions perpendicular to a face, affecting lighting and shading |
| Topology | The arrangement of vertices, edges, and faces in a model |
Understanding these fundamental concepts will help you create 3D models that are both visually appealing and functional. As you progress, you’ll learn more advanced techniques to refine your skills. But for now, focus on mastering the basics to build a solid foundation for your 3D animation project.
Essential Animation Principles
As you start to animate, you’ll want to keep certain essential principles in mind to bring your scenes to life.
You’ll learn how to exaggerate movements with Squash and Stretch rules, creating a more dynamic feel.
Next, you’ll discover how to build anticipation and follow through with action, making your animations more engaging and believable.
Squash and Stretch Rules
Your understanding of squash and stretch rules is crucial to creating believable and engaging animations, as these principles help bring a sense of weight, flexibility, and realism to your characters’ movements.
By applying these rules, you’ll add depth and emotion to your animations, making them more relatable and riveting to your audience.
Some key aspects to keep in mind when working with squash and stretch rules:
Exaggerated motion: Cartoon dynamics rely on exaggerated movements, where characters stretch and squash to emphasize their actions and emotions.
Elastic motion: Characters should move with an elastic, spring-like quality, as if they’re made of rubber or putty.
Weight and gravity: Your characters should respond to gravity and their environment, with squash and stretch movements that reflect their weight and mass.
Timing and spacing: Control the timing and spacing of your squash and stretch movements to create a sense of fluidity and natural motion.
Anticipation and Action
When you’re preparing to launch into an action, you’ll want to create anticipation in your audience, hinting at what’s to come and building tension before the main event.
This essential animation principle is vital in engaging your viewers and making the subsequent action more believable and impactful.
To achieve anticipation, you can use motion cues such as a character’s eyes darting towards the direction of the upcoming action or a slight lean forward, signaling they’re about to move.
Physicality cues like a twitching muscle or a deep breath can also hint at the impending action.
Creating Realistic Textures
You’ll need to gather reference images of real-world materials to accurately recreate their textures in your 3D animation. This might seem tedious, but crucially necessary to understand the intricacies of texture mapping. By studying how light interacts with different materials, you’ll be able to create more realistic textures.
Material Science: Understanding the physical properties of materials will help you create more authentic textures. Research how materials respond to light, their reflectivity, and transparency.
Texture Mapping: Learn how to apply textures to your 3D models using UV unwrapping and mapping techniques.
Reference Images: Collect high-quality reference images of different materials, such as wood, metal, or fabric, to study their textures and patterns.
Experimentation: Don’t be afraid to experiment and try new techniques to achieve the desired texture. Practice makes perfect, and you’ll eventually develop your own style.
Bringing Models to Life
Animation breathes life into static 3D models, and mastering this process is crucial to creating engaging scenes that captivate your audience. You’ve already spent hours crafting intricate textures and models, but now it’s time to make them move.
Bringinging your models to life requires a deep understanding of motion capture and emotional expression.
With motion capture, you can record realistic movements and translate them into your 3D scene. This technique allows you to create fluid, natural-looking animations that draw the viewer in.
But motion capture is only half the battle – you also need to convey emotional expression. This can be achieved through subtle gestures, facial expressions, and body language.
By mastering these techniques, you’ll be able to create characters that resonate with your audience on a deeper level.
As you start experimenting with motion capture and emotional expression, remember to keep it simple. Start with basic movements and gradually build up to more complex actions.
Practice makes perfect, so don’t be discouraged if it takes a few tries to get it right.
With patience and practice, you’ll be bringing your models to life in no time.
Lighting and Rendering Essentials
As you explore the world of 3D animation, you’ll soon realize that lighting and rendering are vital elements in bringing your scenes to life.
You’ll need to understand how to set the mood with lighting, choose the right type of lighting for your scene, and optimize your rendering process to achieve stunning results.
Setting the Mood
Establishing the right lighting and rendering setup is crucial to creating a believable atmosphere in your 3D scene, allowing you to evoke emotions and guide the viewer’s attention. You want to transport your audience to a world that feels immersive and engaging. To accomplish this, you’ll need to ponder the mood you want to convey and the emotions you want to evoke.
Create a mood board to visualize your scene’s atmosphere and color palette. This will help you stay focused on the emotions you want to convey.
Experiment with atmospheric colors to create a sense of depth and volume in your scene.
Balance contrast and brightness to create visual interest and guide the viewer’s attention.
Don’t forget to ponder the time of day and weather conditions to add an extra layer of realism to your scene.
Lighting Types Explained
You’ll work with five fundamental lighting types to craft a rich and immersive atmosphere in your 3D scene: ambient, directional, point, spot, and volumetric lights.
Each type serves a unique purpose in shaping the mood and ambiance of your scene. Ambient lights create a soft, overall illumination, while directional lights simulate the sun or moon’s intense rays.
Point lights are similar to lamps or candles, casting a focused beam. Spot lights are more concentrated, often used for dramatic effects.
Volumetric lights, like fog or mist, add depth and atmosphere.
Mastering these lighting types will help you create a wide range of lighting moods, from soft and serene to bold and dramatic.
Don’t forget to experiment with Ambient Occlusion, which adds subtle shadows and depth to your scene.
By combining these lighting types, you’ll create a visually stunning and engaging environment that draws your audience in.
Rendering Best Practices
Optimize your rendering settings to ensure the quality of your final image. This crucial step can make or break the quality of your final image.
Organize your scene with Render Layers: Divide your scene into separate layers to control the rendering process and make adjustments easier. This will also allow you to work on individual elements without affecting the entire scene.
Optimize your lighting: Verify your lighting is balanced and not overpowering, as this can lead to blown-out highlights or lost details.
Use Post Processing techniques: Enhance your image with post-processing effects like color correction, contrast, and saturation to give it a professional finish.
Test and refine: Don’t be afraid to experiment and make adjustments as needed. Rendering is an iterative process, and testing different settings will help you achieve the desired outcome.
Advanced Techniques and Tips
Diving into advanced 3D animation techniques, you’ll soon discover that mastering subtle motions and nuanced character animations can elevate your work from good to great.
One way to achieve this is by using motion capture technology, which records real-life movements and translates them into digital data. This allows you to create realistic character animations that feel authentic and engaging.
Another advanced technique to explore is physics simulations, which enable you to create realistic interactions between objects and their environments. By incorporating these simulations into your scenes, you can add a level of authenticity and depth that would be difficult to achieve through manual animation.
To take your animations to the next level, focus on subtle details such as weight, balance, and momentum.
Pay attention to how characters interact with their surroundings and how objects respond to external forces.
By mastering these advanced techniques, you’ll be able to create animations that aren’t only visually stunning but also emotionally resonant.
With practice and patience, you’ll be well on your way to creating 3D animations that captivate and inspire your audience.
Frequently Asked Questions
Can I Learn 3D Animation Without Prior Drawing Skills?
You don’t need prior drawing skills to learn 3D animation, and that’s what makes it so exciting! You’ll discover creative freedom, unbound by traditional artistic limitations, allowing you to bring your imagination to life in a whole new dimension.
How Long Does It Take to Become Proficient in 3D Animation?
You’ll need a consistent time commitment to reach animation milestones, and it’ll take around 1-3 years to become proficient in 3D animation, depending on the frequency and quality of your practice, and your individual learning pace.
Is 3D Animation Only Used in Movies and Video Games?
You’ll be surprised to know that 3D animation is used beyond movies and video games – it’s also in TV commercials, Virtual Reality experiences, and even architectural visualizations, making it a versatile and in-demand skill.
Can I Use 3D Animation for Architectural Visualization?
You can definitely use 3D animation for architectural visualization, creating stunning virtual walkthroughs and building simulations that bring designs to life, helping clients and stakeholders better understand and interact with proposed spaces.
Do I Need a Powerful Computer for 3D Animation?
You’ll need a computer that meets specific System Requirements for 3D animation. Focus on Computer Hardware like a multi-core processor, ample RAM, and a dedicated graphics card to guarantee smooth performance and efficient rendering.
Conclusion
You’ve made it! You’ve taken the first steps towards mastering 3D animation.
Remember, practice is key, so keep experimenting and pushing yourself.
Don’t be afraid to try new things and make mistakes – they’re an essential part of the learning process.
With these beginner-friendly tutorials, you’ve got a solid foundation to build on.
Now, go forth and bring your imagination to life in 3D!