Storyboard
As you create a storyboard, you're essentially visualizing every frame and sequence of your project, whether it's a film, animation, or video. This crucial step helps you nail down pacing, experiment with camera angles, and plan for special effects before production starts. A traditional storyboard offers a tactile experience with hand-drawn images and annotations, while digital storyboards provide a interactive and collaborative workflow. By planning each scene and shot, you'll ensure everyone involved is on the same page. Take a closer look at how storyboards have evolved, their different types, and the benefits they bring – and see how it can transform your project.
Key Takeaways
- Storyboarding originated with Winsor McCay and Émile Cohl in the early 20th century, influencing film and animation development.
- Traditional, digital, and hybrid storyboards cater to different workflows and creative preferences in the design process.
- A clear, concise visual narrative is crucial in storyboarding, with each panel serving a purpose to convey key emotions or actions.
- Scene transitions, pacing, and shot composition are vital elements in creating a cohesive visual experience for the audience.
- Storyboarding helps refine pacing, plan special effects, and ensure collaboration among team members working towards a common goal.
History of Storyboards
As you step into the world of visual storytelling, you'll find that the history of storyboards dates back to the early 20th century, with the pioneering work of Winsor McCay and Émile Cohl.
These innovators developed techniques that laid the groundwork for modern storyboarding. McCay's animated film, "Gertie the Dinosaur" (1914), is often cited as the first use of storyboards in animation.
Meanwhile, Cohl's experiments in sequential art led to the development of comic strips, a fundamental building block for visual storytelling.
The storyboard evolution continued with the advent of film and television. In the 1920s and 1930s, artists like Milt Kahl and Ward Kimball used storyboards to plan Disney's animated classics.
This method allowed filmmakers to visualize and refine their ideas before production. Ancient visualization techniques, such as cave paintings and hieroglyphics, also influenced the development of storyboarding.
These early forms of visual communication relied on sequential images to convey narratives. By combining these ancient techniques with modern media, storyboards became an essential tool for creators to bring their stories to life.
Today, storyboards continue to play a vital role in the production of films, TV shows, and other visual media.
Types of Storyboards
When you explore the world of storyboards, you'll encounter a range of formats that cater to different creative needs.
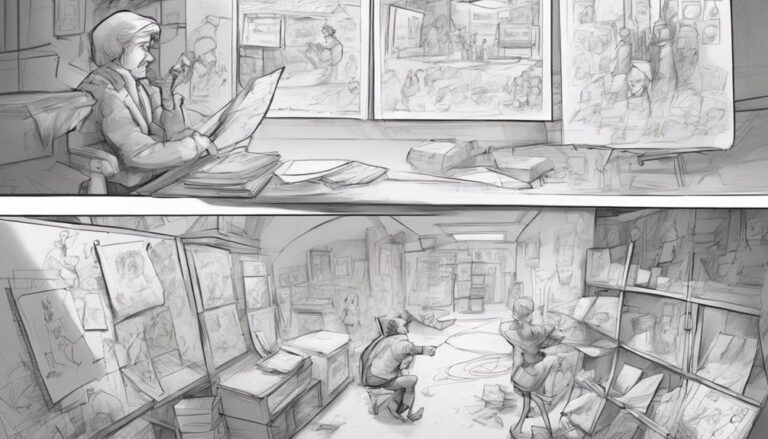
Traditional storyboards bring a tactile experience, with hand-drawn images and annotations on paper or boards, offering a sense of intimacy and flexibility.
You can also opt for digital storyboards, which use software to create and share interactive, animated sequences, or hybrid storyboards, which blend traditional and digital techniques to achieve a unique workflow.
Digital Storyboards
Within the realm of modern filmmaking, digital storyboards have revolutionized the way you plan and visualize your project.
Gone are the days of tedious hand-drawn sketches and endless revisions.
With digital storyboards, you can effortlessly create, edit, and share your vision with collaborators worldwide.
Digital storyboards enable seamless digital collaboration and virtual workflow, making it easier to work with team members across different locations.
You can create and share digital storyboards with just a few clicks, allowing for real-time feedback and revisions.
This streamlined process saves time and reduces errors, ensuring your project stays on track.
Some key benefits of digital storyboards include:
- Enhanced collaboration: Invite team members to view and comment on your digital storyboard in real-time.
- Version control: Easily track changes and revisions to your digital storyboard.
- Customizable templates: Choose from a variety of pre-made templates or create your own to suit your project's needs.
- Integration with other tools: Seamlessly integrate your digital storyboard with other filmmaking software and tools.
Traditional Storyboards
Digital storyboards have undoubtedly streamlined the planning process, but traditional storyboards still hold a unique place in the world of filmmaking.
As you create a traditional storyboard, you'll use a physical space to visualize your sequence of events.
This can be a large piece of cardboard, a whiteboard, or even a wall, where you'll arrange a series of images, often hand-drawn or printed from a camera.
You'll use stickies, push pins, or tape to secure these images, creating a tactile and immersive experience.
Traditional storyboards offer a level of creative freedom that's hard to replicate with digital tools.
You can easily move scenes around, experiment with different arrangements, and make spontaneous changes.
This hands-on approach can be incredibly beneficial for brainstorming and developing your ideas.
While traditional storyboards may seem old-fashioned compared to the rapid evolution of storyboard software, they remain an essential part of the filmmaking process.
Many directors and producers still swear by traditional storyboards, using them in conjunction with digital tools to create a more comprehensive and engaging visual narrative.
Hybrid Storyboards
A multitude of filmmakers now find themselves at the intersection of traditional and digital storyboarding, where hybrid storyboards offer the perfect blend of tactile and technological benefits.
This fusion of old and new techniques has given rise to a storyboard fusion that combines the expressiveness of hand-drawn images with the versatility of digital editing tools.
By embracing a hybrid workflow, you can harness the strengths of both traditional and digital storyboarding methods.
For instance, you can sketch out rough ideas by hand, then scan and import them into digital software for further refinement.
This allows for a seamless transition between creative phases, streamlining your workflow and saving time.
Some key benefits of hybrid storyboards include:
- *Enhanced collaboration*: Easily share and review digital versions of your boards with team members.
- *Increased flexibility*: Make changes and revisions on the fly, without worrying about erasing or redoing entire sections.
- *Improved organization*: Keep track of multiple versions and iterations, all in one digital space.
- *Time-saving*: Automate tedious tasks, such as formatting and layout, to focus on the creative aspects of your project.
Storyboard Design Process
You'll often find that the storyboard design process begins with a flurry of ideas, as you rapidly sketch out key scenes and sequences.
This initial phase is crucial, as it helps you establish the visual narrative of your project.
As you start to refine your ideas, you'll likely transition to using storyboard software, which offers a range of tools to help you organize and visualize your sequence.
With your ideas taking shape, you'll begin to think about the specifics of each scene, including character placement, camera angles, and lighting.
Your storyboard software will allow you to experiment with different layouts and arrangements, making it easy to test and refine your ideas.
Collaboration is also a key aspect of the storyboard design process, as you work with team members to ensure everyone is on the same page.
A collaborative workflow allows you to share your work with others, gather feedback, and make revisions in real-time.
Creating a Storyboard Template
As you set out to create a storyboard template, you'll need to define the layout design that will serve as the foundation for your visual narrative.
Consider the visual elements you'll use to bring your story to life, from characters and props to backgrounds and special effects.
With these components in mind, you can start thinking about how you'll plan scene transitions to guide the viewer's eye through your story.
Storyboard Layout Design
When crafting a storyboard template, your vision takes center stage.
You're tasked with creating a visual representation of your narrative, and every element – from composition to typography – contributes to the overall flow of your story.
This is where layout principles come into play. A well-designed layout guides the viewer's eye through the sequence of events, drawing attention to key elements and creating a sense of tension and release.
To achieve this, consider the following layout principles:
- Balance: Distribute visual elements to create a sense of stability and harmony.
- Proportion: Ensure each panel is proportional to the others, creating a cohesive visual flow.
- Negative space: Use empty space to create a sense of breathing room and guide the viewer's eye.
- Visual hierarchy: Organize elements to draw attention to the most important aspects of each scene.
Storyboard software can be a valuable tool in this process, offering features like drag-and-drop functionality and customizable templates.
However, it's essential to remember that software is merely a means to an end – it's your understanding of layout principles that will bring your vision to life.
Visual Elements Choices
Carefully selecting visual elements is often the make-or-break factor in creating an engaging storyboard template.
When choosing elements, you need to consider the Visual Hierarchy, which refers to the organization of elements in order of importance. This hierarchy guides the viewer's attention through the storyboard, ensuring that the most critical information stands out.
To create a clear hierarchy, use size, color, and placement to differentiate between elements.
Your Color Palette is another crucial aspect of visual element selection. A well-chosen palette can evoke emotions and set the tone for your story.
Limit your palette to 3-5 core colors and use variations of these colors to create visual interest. Consider the emotional associations of different colors and choose a palette that aligns with your story's mood and atmosphere.
When selecting visual elements, remember that consistency is key.
Choose elements that align with your story's style and tone, and use them consistently throughout the storyboard. This will create a cohesive visual language that engages your audience and effectively communicates your story.
Scene Transition Planning
Every scene in your storyboard requires a thoughtful transition to the next, guiding your audience through the narrative seamlessly.
As you create your storyboard template, consider the flow of each scene into the next, ensuring a cohesive and engaging visual experience. Scene flow and transition timing are crucial elements in maintaining your audience's attention and emotional investment.
To plan effective transitions, consider the following key elements:
- *Match cut transitions*, where the last frame of one scene matches the first frame of the next, creating a seamless visual connection.
- *Cutaways*, which interrupt the main scene to provide additional context or information.
- *Dissolves*, which fade one scene into the next, often used to signal a change in time or location.
- *J-cuts and L-cuts*, which use audio to bridge the gap between scenes, creating a smoother transition.
Benefits of Using Storyboards
Using a storyboard can help you visualize your ideas more effectively and stay on track throughout the production process.
By breaking down your project into individual scenes and shots, you can see the entire narrative unfold before your eyes. This visual planning allows you to identify potential issues and make necessary adjustments before they become major problems.
Storyboarding fundamentals emphasize the importance of simple, clear drawings that convey the essential elements of each scene.
By focusing on the key actions, characters, and settings, you can create a visual roadmap that guides your production. This helps ensure that everyone involved in the project is on the same page, working towards a common goal.
With a storyboard, you can refine your pacing, experiment with different camera angles, and plan for special effects.
Common Storyboard Mistakes
Stepping into the world of storyboarding can be a double-edged sword – it's a powerful tool for visualizing your ideas, but it also leaves room for costly mistakes that can derail your project.
As you begin to create your storyboard, it's essential to be aware of common pitfalls that can hinder your progress.
Storyboard flaws can range from minor issues to major problems that impact the overall narrative.
Some common storyboard pitfalls to watch out for include:
- *Inconsistent pacing*: Failing to balance action, dialogue, and quiet moments can lead to a disjointed viewing experience.
- *Poor shot composition*: Neglecting to consider the framing, lighting, and camera angles can result in a visually unappealing sequence.
- *Lack of clear character development*: Failing to establish distinct personalities, motivations, and backstories can make characters feel flat and unrelatable.
- *Inadequate scene transitions*: Not considering the flow between scenes can disrupt the narrative's continuity.
Storyboarding Best Practices
Storyboard
Common Storyboard Mistakes
Storyboarding Best Practices
Armed with knowledge of common storyboard pitfalls, you're now ready to dive into the realm of effective storytelling.
As you embark on this journey, focus on developing a clear, concise visual narrative that captivates your audience.
To achieve this, utilize storyboard software to streamline your process, allowing you to experiment with different ideas and layouts with ease.
When creating your storyboard, keep it simple and focused.
Use a consistent visual style and avoid cluttering the panels with too much information.
Ensure each panel serves a purpose, advancing the story and conveying key emotions or actions.
Show, don't tell, and trust your audience to infer meaning from the visuals.
Gather Storyboard feedback from peers, mentors, or industry experts to refine your craft.
Constructive criticism can help you identify areas for improvement and strengthen your narrative.
Frequently Asked Questions
Can I Create a Storyboard Without Drawing Skills?
You don't have to be a skilled artist to create impactful visuals; your ideas can shine despite visual limitations. Seek non-artist solutions like templates, stick figures, or digital tools to help you convey your vision effectively.
How Long Does It Take to Create a Storyboard?
When tackling a project, you'll face time constraints and a defined project scope. Given these factors, the time it takes to create a visual plan can vary greatly, from a few hours to several days or even weeks.
Can I Use Storyboards for Personal Projects Only?
You chase personal goals, relishing creative freedom. Unshackled by external expectations, you can explore, express, and experiment with ideas. This freedom translates well to using visual planning tools, like storyboards, for personal projects, fostering innovation and self-expression.
What Software Is Best for Digital Storyboarding?
You're on the hunt for the perfect digital canvas. When it comes to digital storyboarding, you'll love software like TVPaint, Toon Boom, or Adobe Animate, offering intuitive collaborative tools to bring your vision to life.
Can Storyboards Be Used in Non-Visual Presentations?
You're planning a non-visual presentation, and you wonder if a visual aid can enhance it. Yes, you can use storyboards to organize your narrative, boost audience engagement, and refine your presentation structure for a compelling delivery.
Conclusion
You've crafted a visual roadmap, mapping out every shot, every angle, and every beat. Your storyboard is a living, breathing entity that pulses with the rhythm of your narrative. With each panel, you've distilled the essence of your story into a potent cocktail of images and emotions. Now, as you gaze upon your finished storyboard, you see the very fabric of your tale unfolding before your eyes, a testament to the power of visual storytelling.


